
The Polonsky Foundation Greek Manuscripts Project: Medieval Eastern Mediterranean Binding Model – Part 3.
Welcome to another Polonsky Foundation Greek Manuscripts Conservation update! This is the final instalment in our Medieval Eastern Mediterranean binding model. Previously, we covered our models – now, it was time for the fastenings. As with the covering, this aspect of our model-making journey was done from home. Even without our usual tools and resources we managed it – conservators are nothing if not creative and resilient! Shaun Thompson (Project Conservation Lead) made the metal pieces we required for the fastenings and guided us through the process of creating the straps via video call.

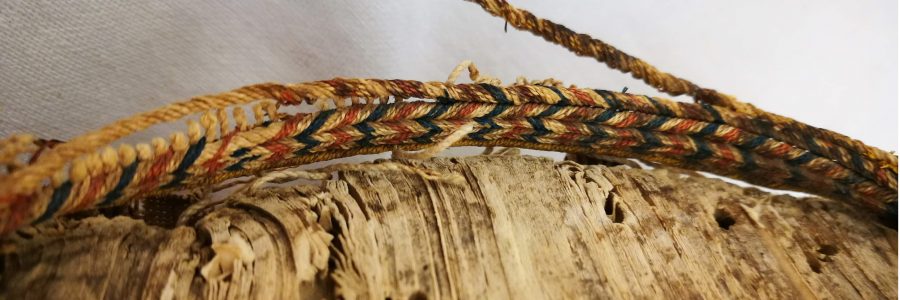
Eastern Mediterranean bindings usually have fastenings constructed of a metal alloy edge-pin, pin clasp and tanned skin strap. Fastenings were used to hold the boards of a book together to keep it closed and to keep the leaves flat. We know of examples of clasps that fitted over edge-pins from at least the 10th century onwards. The clasp would have been used at the end of a strap fixed to one cover, and they are pierced with a hole which fitted over an edge-pin on the opposite cover. The clasp also has a projecting terminal, with a pierced hole, to hold a pull to help in release the clasp from the edge-pin. The straps found on Eastern Mediterranean bindings are often double or triple interlaced straps laced through one board which are attached to pin clasps which fit over pins in the edges of the other board.
The type of strap we made for our model is divided into three separate braided elements, resulting in a triple interlaced strap with a chevron pattern. Most books have one or two fore-edge fastenings, but some – like our model – have four fastenings: two at the fore-edge, one at the head and one at the tail.
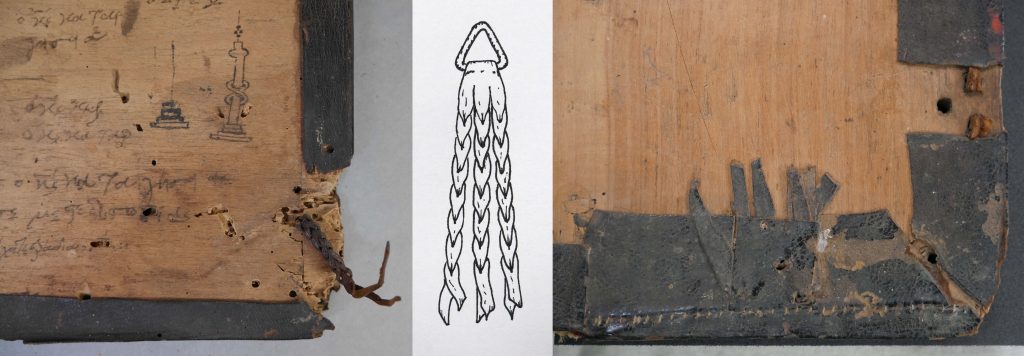
Left: CUL MS Add.3048. Fragment of a braided fastening. Centre: Diagram of a triple interlaced strap and metal alloy pin clasp (drawing by Samuel Foley). Right: CUL MS Add.2603. Fragment of braided fastening in the right wooden board. The length of the strap is missing.
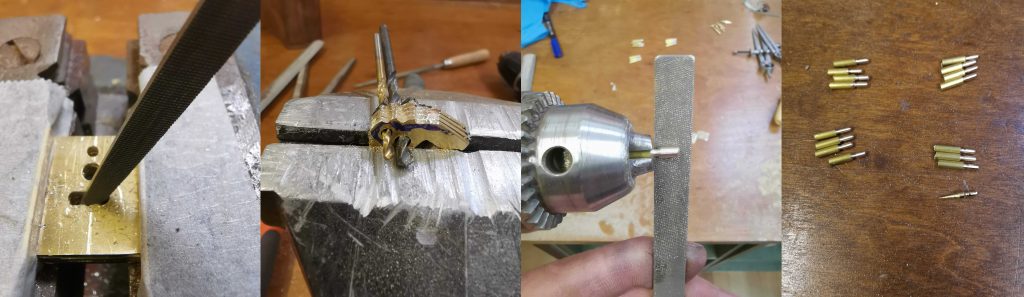
The metal alloy pin clasps were made from sheet metal alloy that was drilled and shaped with a file. The edge-pins were made from metal alloy rod, this was placed into a rotating chuck and files were used to shape the end. The tang (the part of the pin to be inserted into the board) was then tapered to a point to be inserted into the edge of the board.
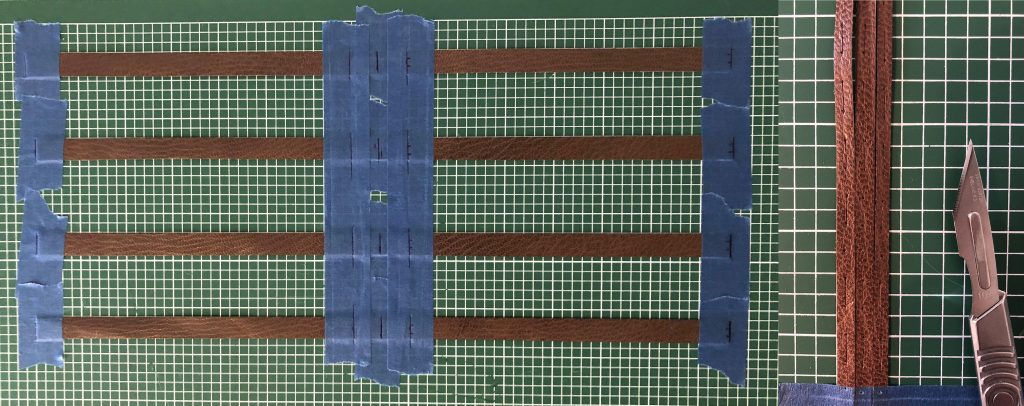
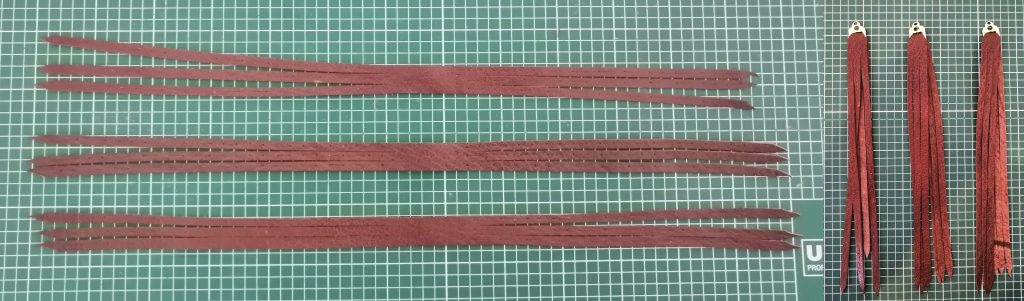
To make the straps we began by cutting four 300 x 12mm leather strips of the same tanned goat skin used for the covering. The leather was taped to a cutting mat at the ends and centre with masking tape. A 25mm section was left intact in the centre of the strap (12.5mm to each side) and the width then divided into three 4mm strips, cut with a scalpel.
Tip: covering the leather strip with masking tape keeps it in place, avoids movement during cutting and makes it easier to see pencil/divider measurement marks.
Each of the 4mm strips was then marked at 6mm intervals from the centre to end. Beginning at the first two marks from the centre end (on one side), the first 6mm slit was made. A gap was left, and the third and fourth marks used to make the second slit. This was repeated until the end of the strip. For the corresponding strip on the opposite side of the centre 25mm section, the opposite marks were used to form slits – i.e. the second and third mark, fourth and fifth mark, and so on. This was to ensure that the slits were correctly staggered when the leather strip was folded and interlaced.
To braid the straps, the leather strip was folded in half at the centre point of the 25mm intact section. The two corners of the fold were trimmed on a diagonal, for a better fit in the metal alloy pin clasp. The ends of each 4mm strip were cut into a point to facilitate the braiding.
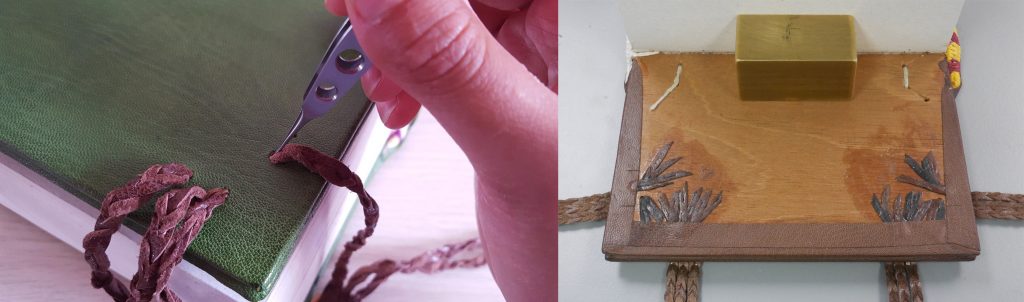
The braiding process is easier when the metal clasp can be secured to a structure such as the one improvised by Marina Pelissari with books and a needle (see video below), but can also be done without. An awl can be used to help open the slits.
The braided interlacing was then achieved by passing the pointed end of a lower leather strip through the first slit of the accompanying top strip. The top strip then became the bottom strip. The process was repeated for each pair of strips, creating a chevron pattern.
When all 4mm strips had been braided, it was time to attach them to the book. Four sets of three holes where made in the right wooden board, through which the triple interlaced straps were laced. The edge-pins were then inserted into to the edges of the left board. The ends of the braids on the inside of the right board were un-braided to avoid excess bulk, trimmed and pasted down.
All that remained to complete the fastenings was to add the single slit-braid pulls – attached through a small hole at the end the pin clasp to make it easier to pull them off of the edge-pins. This was done in the same way as the triple interlaced straps, but with a single braid.
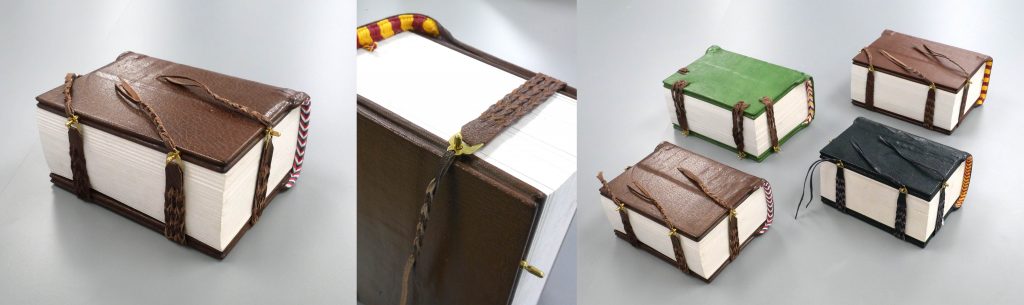
We hope you enjoyed our model-making experience as much as we did!
Shaun Thompson, Sam Foley, Marina Pelissari & Marie Renaudin
Polonsky Foundation Greek Manuscripts Conservators